Are you looking forward to Starting Blogging with WordPress? This is a 10 Minute guide with 5 easy steps to “start a blog with WordPress”. Guide for 2026.
Follow the steps to start your successful blogging career in 2026 and have a money-making blog ready.
Overview
It’s good that you are planning to start your first blog. That’s a great idea, but you should also know that there are so many types of bloggers on the internet. So, what type of WordPress blog are you planning to start?
I have been in the content writing field for the last 10 years, and I post content related to web hosting, best gaming servers, and related services. As a blogger, I always suggest picking the right niche, and reliable hosting is crucial to start a blog.
You should know that there are thousands of bloggers having the same niche and blogging on it.
But the question is how your blog will be different from the other bloggers. So, today we are going to discuss all this: “How to start a WordPress Blog?” or “How to create a WordPress Blog”.
Without wasting any time, let’s jump into the topic.
Table of Contents
- Overview
- Select a Niche for you
- Get Domain Name Ideas
- Purchase a good Web Hosting to start a WordPress Blog
- Install WordPress and Configure
- Themes and Plugins Installation – WordPress
- Add plugins on WordPress Blog
- How to Add and Publish your First Blog?
- How to create categories and tags for WordPress blogs?
Select A Niche For You
The very first step for you is to decide on a niche for your blog. A Niche tells what your WordPress blog is about and what to prioritize while writing.
Suppose you are going to start a Travel Blog, so your niche should be around traveling. That’s how a niche defines your blog.
Some Of The Popular Evergreen and Beginner Friendly Blog Niche Topics:
- Food blogs
- Travel blogs
- Health & Fitness Blog
- Lifestyle Blog
- Fashion & beauty Blog
- Parenting Blog
- Business Blog
- Gaming Blog
- Finance Blog
- Budget shopping-related blogs
- Personality development blog
- Educational blog
- Marketing blog
Get Domain Name Ideas
As I said above, the domain name impacts a lot in your business. Your domain should reflect the image of your business or yourself, whatever you want.
The company Facebook has the domain Facebook, and Google also has the domain Google.
In short, the domain must reflect the clear image or purpose of your business.
Domain Should Relate To Your Business
As I said above, the domain name impacts a lot in your business. Your domain should reflect the image of your business or yourself, whatever you want.
The company Facebook has the domain Facebook, and Google also has the domain Google.
In short, the domain must reflect the clear image or purpose of your business.
Choose Domain Extension
First of all, what is a domain extension? A domain is the last part of the URL after the dot. Domain Extension defines the type and sometimes the region of your business.
Let’s have an example of a .com domain extension. The .com domain extension defines that your business is commercial.
The .in extension tells the region of your website and denotes India.
Here are some of the top domain extensions mentioned below: –
| Domain Extensions | Entity |
| .com | Commercial |
| .net | Network |
| .org | Organization |
| .int | International |
| .edu | Education |
| .gov | The U.S. national and state government agencies |
These are the Top Level of Domains that can be used all over the world. There are so many domain extensions for you that can be used according to your needs. You can check the list of those extensions from here.
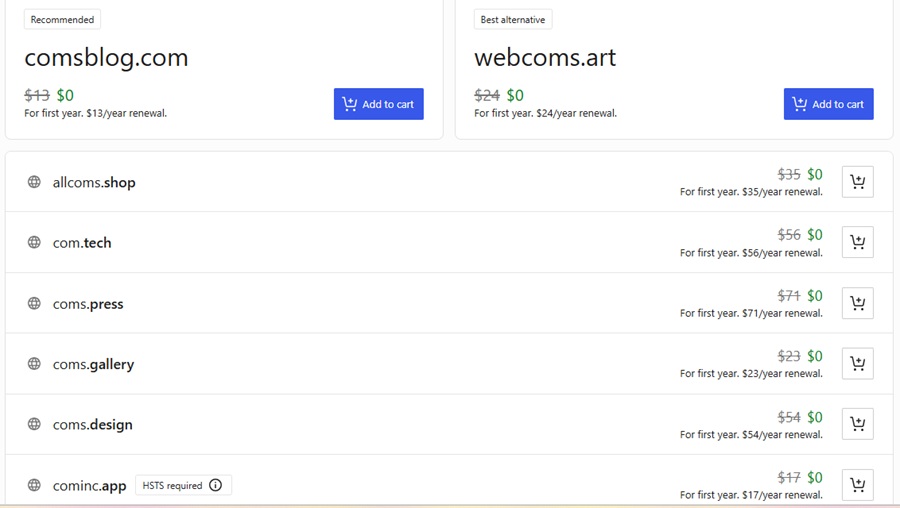
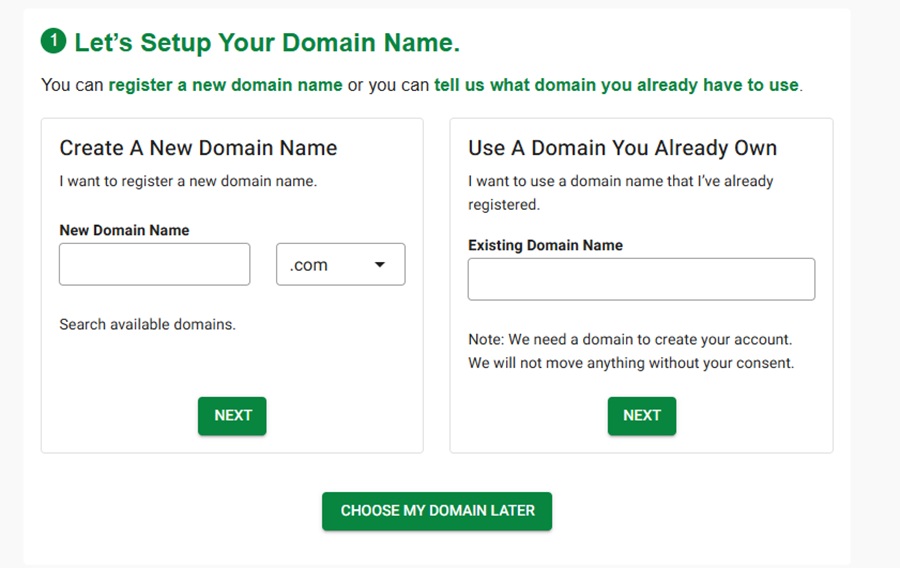
Search For Availability Of Domain
Okay, up to here we are going well; we have selected a domain name for our business, but what if the domain you have selected is already taken by someone and is not available for you?
So your domain name should be unique and should be available.
After you choose a domain name and your domain is available, you should go to further steps to start a WordPress blog.
Purchase Good Web Hosting To Start A WordPress Blog
Web Hosting is required to put your business website in front of the public. Choosing good web hosting can help your business to grow in the future.
There are so many web hosting providers in the online market. You have lots of options to buy web hosting, but having good web hosting is also important for your business website.
Steps To Purchase Web Hosting
There are very few simple steps to purchase web hosting for your website are as follows: –
Choose The Best Hosting Site
The first step is to choose the best hosting website for your business. Go to the best hosting provider and check their plans and pricing page. Look at their plans and choose the best plan that suits your budget.
Here I am going with Greengeeks.com hosting, as they are good when it comes to WordPress hosting. You can choose according to your needs and comfort.
You should go for WordPress hosting as it offers user-friendly, optimizing features, and affordable hosting.
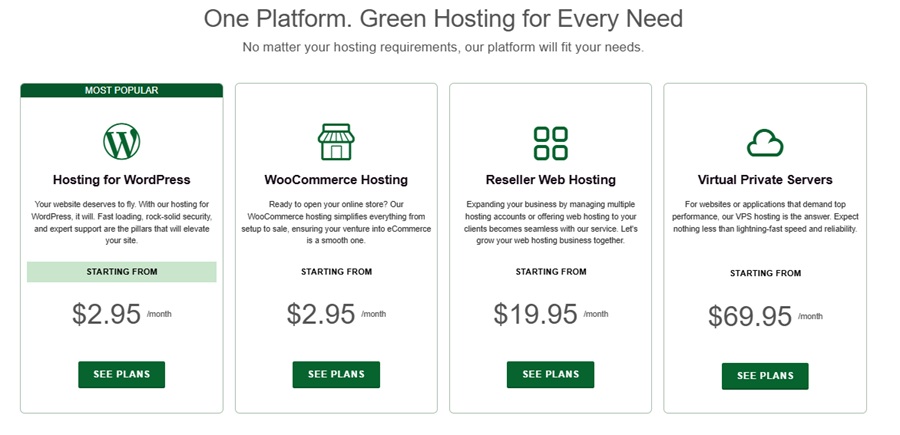
Greengeeks Hosting Options
Here, I have attached the Hosting Options available on Greengeeks.com. You can buy hosting from here. You should go for WordPress Hosting as WordPress is pre-installed under this hosting plan.
Plans & Pricing.
You can buy a Yearly Plan for hosting your websites. Hosting Providers also provide you with a monthly plan, but they charge a bit more for the monthly plans compared to the annual.
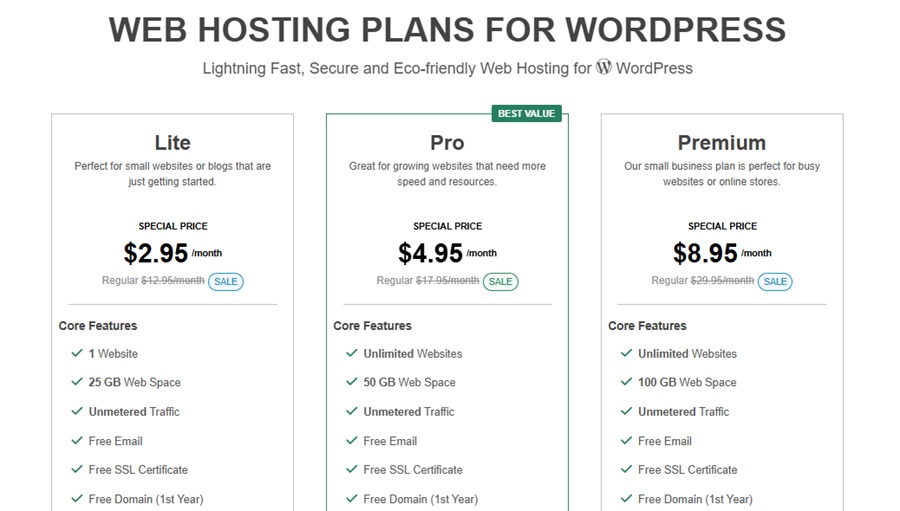
Hosting Plans of Greengeeks.com
Here, the above picture shows the monthly and yearly charges of hosting, and also contains the features provided by Greengeeks.com
You can Check Further details related to Greengeeks plans here.
Payment Methods
You have to buy the hosting either monthly or yearly. You need to pay the payment in advance through Net Banking, or you can use your Credit Card.
If you don’t have a domain, you can buy one, and if you already have a domain, you also have the option for this.
After you have a domain, you will be redirected to further information and a payment page, and you can buy your WordPress hosting further.
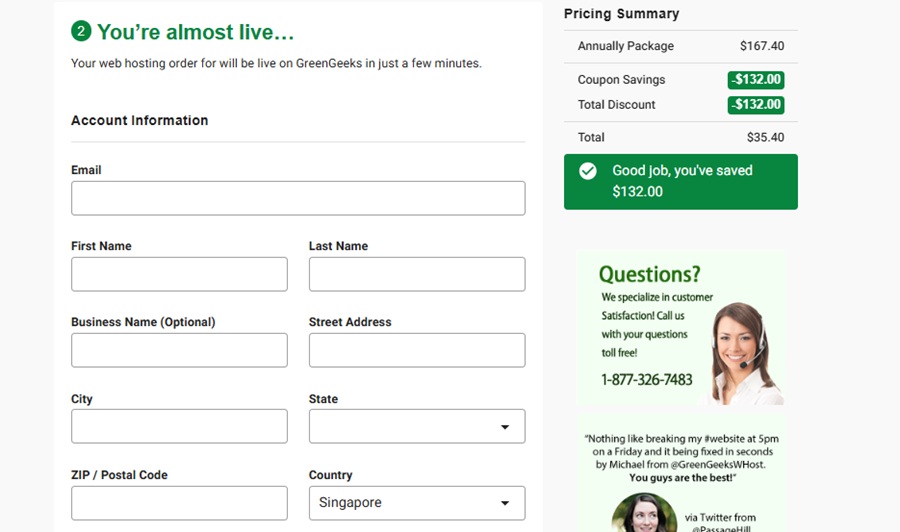
Here is the payment page of GreenGeeks Hosting that can be purchased using your PayPal, VISA Card, or MasterCard.
Install WordPress and Configure
WordPress is pre-installed in the WordPress Hosting plan of GreenGeeks. You do not have to install WordPress manually.
Log In To Your WordPress
Once you have your WordPress hosting, you will be automatically redirected to your WordPress login page. Generally, it is like (yourdomain.extension/wp-admin or wp-login).
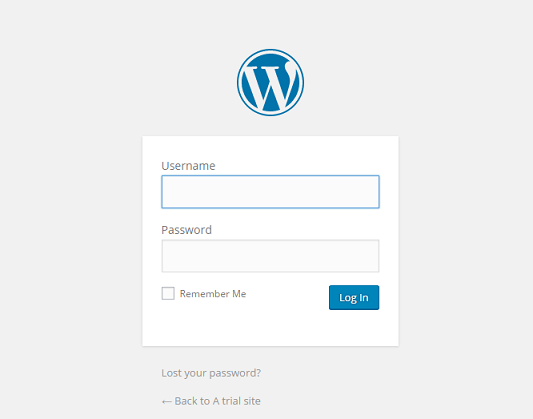
Enter your username and password correctly, and you will be redirected directly to your dashboard.
The WordPress Dashboard looks like this:
Here is your dashboard for managing your website. You can control all settings and everything related to your website from the admin panel.
The Configuration Needs To Be Set
Before you start creating your first WordPress blog or installing plugins, you need to set some major and minor settings under your dashboard.
Once you have finalized the Web Hosting and Plan, install WordPress. You can do it through a one-click Softaculous App Installer. Raise tickets if you need support.
Reading – Settings
In this Reading Setting under the Settings tab, you can set the display and number of blogs and many others that appear on the HomePage.
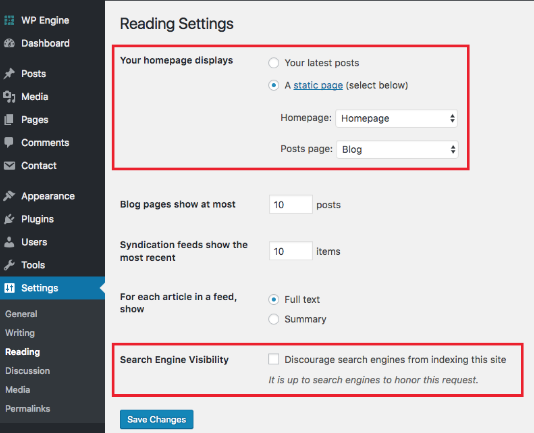
As you can see in the above picture, the admin can set the Homepage as well as the Blog page of his site.
You can set the number of Blogs to appear on your homepage, the number of recent feeds, SEO visibility, etc.
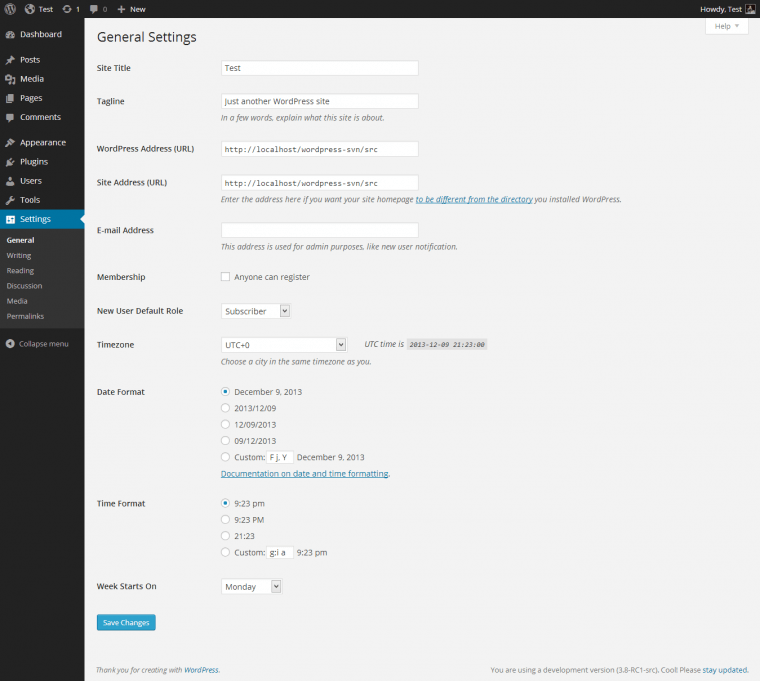
General – Settings
The Site’s Title and Tagline can be set anytime, but knowing this is good for the future. You can set the Title and the Tagline for your website from General Settings under the Settings Tab.
The Image shows that the admin can change the WordPress URL as well as the Site’s URL, so this is very minor but can affect your site a lot.
Permalinks – Settings
Permalinks set your address bar; here the admin decides that what will appear on the URL of the page when the user opens it.
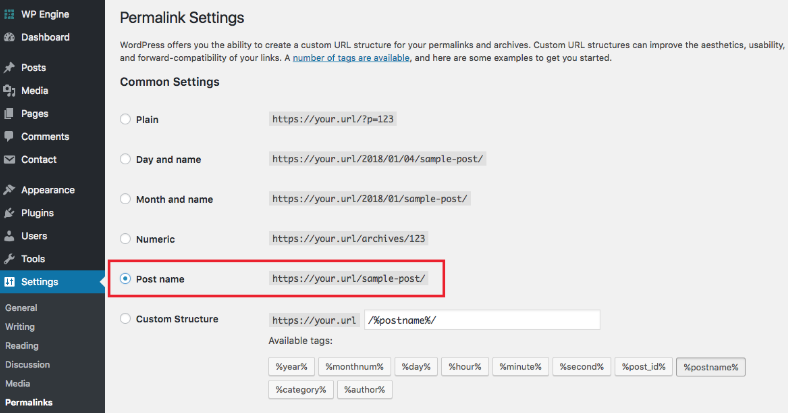
You can see in the above image that the admin can set the URL of the page according to the respective options.
Discussion – Settings
The Discussion Settings allow you to manage the comments sections generally, whether the comments should be approved and then posted on the page, or posted directly without the approval of an admin.

You can check all the required settings in the picture above.
Themes and Plugins Installation – WordPress
Themes and Plugins make your website more attractive and functional. These themes only decide how your blog looks.
There are over 1000’s of free and premium themes, and more than 55,000 Plugins in the official WordPress plugin repository that are available in WordPress.
Choose Themes like GeneratePress or Astra as they are fast. Basic Plugins like Yoast SEO, Updraft Plus, Cachify, and JetPack, that are mainly required.
Read: GeneratePress Reviews | Elementor Pro Review and Pricing
Install WordPress Theme
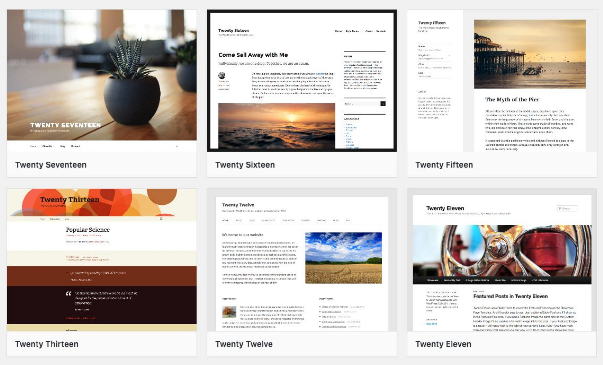
By default, you will get the Yearly WordPress theme activated on your Blog.
You can Add New Themes by clicking on the ” Add New ” Button on the Theme Page.
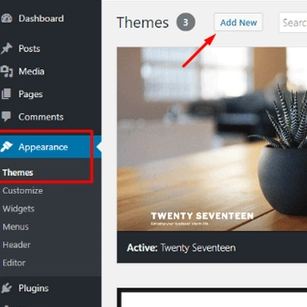
When you hit the Add New button, you will find the number of themes available in front of yours.
Choose your theme from the list and hit the Install button. Once you have installed your theme successfully, you will see the Activate button there.
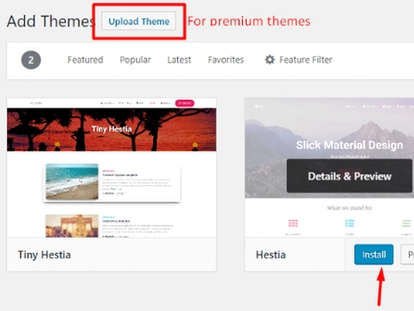
Note: Don’t forget to activate your theme; otherwise, it will not be applied to your site/blog.
Customize Your Activated Theme
For further customization in the Current theme, just go to your Dashboard > Appearance > Customize, where you will find all your installed themes.
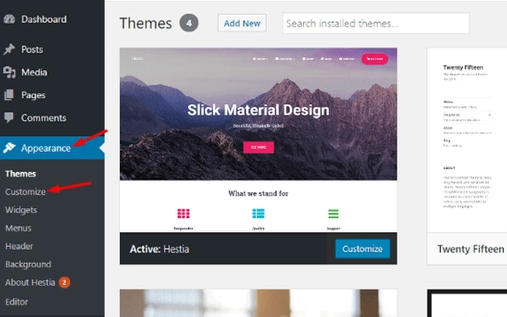
You will see the Customize button at the bottom-right of your themes. Tap that button to make any type of changes to that theme.
When you click that Customize button, you will be redirected to the customization page of that theme, and yes, you will see the live preview of your customizations.
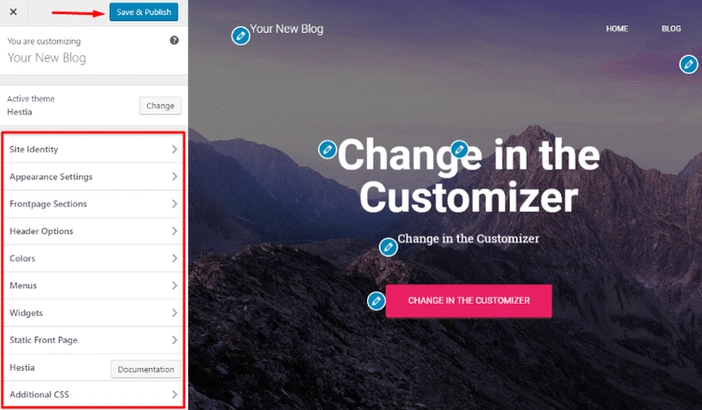
Here you will see the number of things that you can change without any coding or programming.
Note: Whenever you change or customize something here, don’t forget to hit the Save & Publish button at the top-right corner of the left panel.
Add Header & Footer
When you create a WordPress blog, the first thing that appears at the top is the header, and the page always ends with a footer.
Headers and footers are very important sections of your blog, as you add all your important links under these two only, so that the user can find them easily.
You need to go to your Dashboard > Menus, where you will find your Header and Footer Options; you can add them from there.
Add Navigation Menu
Navigation-Menus makes the work easier for the user. Users can find all the important links under the Navigation Bar.
For adding menus under Navigation, you need to go again to your Dashboard > Menus. There you will find an option to add menus to your Navigation Menu.
WordPress Theme Fonts Customization
You need to either add some CSS style, or you can install some font-changing plugins for customizing the font of your blog in WordPress.
If you want to customize the font in some selective areas, then you need to add some CSS code to it.
Just give the specific ID or class to your selective areas, and at the bottom of your customize panel, you will see the option to Add Code. Just style your font according to your needs.
Example: There is a container having a class of box1, so the code will be like.
.box1
{
font-family: arial;
}
And if you want to change your font globally, then the code will be like: –
*
{
font-family: ‘name of your font’;
}
Add Plugins To A WordPress Blog
Till here, you have a domain, web hosting, and Installation of Themes; now it’s time to add more functionality to your WordPress blog. You can do that by installing Plugins.
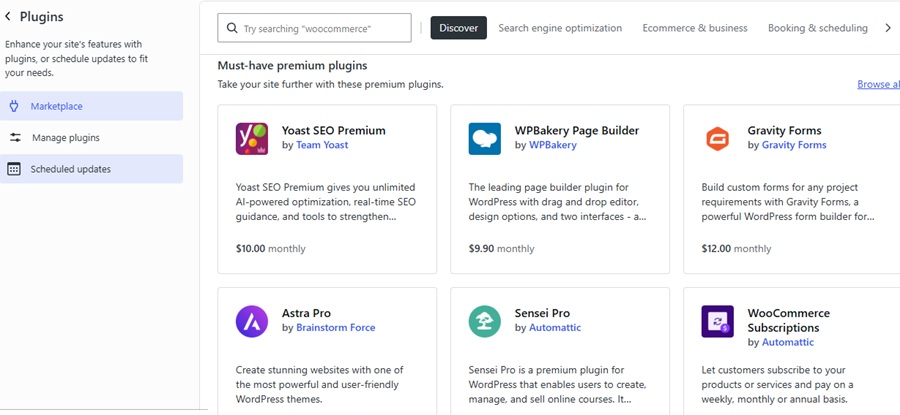
Install and Add Essential Plugins
Having good plugins installed on your website impacts your website. Plugins add functionality and flexibility to your WordPress blog. So, choosing the best plugin is also necessary for your blog.
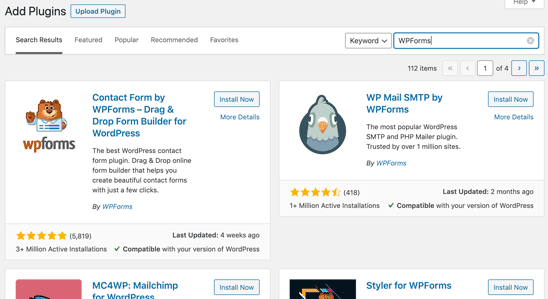
To Add Plugins to your WordPress blog, go to your Dashboard > Plugins > Add New.

Once you are here, you will see the number of Plugins on this page. WordPress gives you over 55,000+ plugins; you can search for the required plugins for your WordPress blog.
Once you have installed your plugin, don’t forget to “Activate” that Plugin.
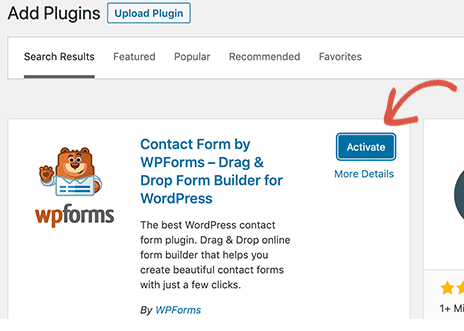
Click on the Activate button, and your Plugin is ready to use.
Some of the Plugins you should use are mentioned below: –
- MonsterInsights
- Elementor
- WPForms
- Yoast SEO
- Sucuri
- OptinMonster
- JetPack, and many others.
Addon facilities that can only be added with the help of Plugins are: –
- Better SEO
- Social Media Sharing Buttons
- Backups
- Contact Forms, and many others.
How To Add and Publish Your First Blog Post?
This is the final step to start your WordPress blog, or we can say to create a WordPress blog after you have completed all the steps described above.
At the very first step, you need to get rid of the default Sample Page. Delete that page because we don’t need it.
Go to Dashboard > Posts > All Post, there you will find this Sample Page.
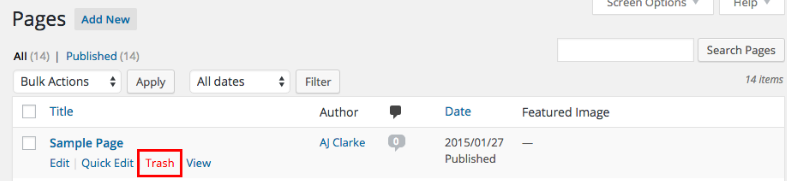
Once you have deleted this page, tap on Add New at the top aligned with Pages. You will be redirected to the default Blog Editor of WordPress. There you can create a WordPress blog.
Okay, if you have reached here, let’s discuss what we can do inside the blog editor.
Add Headings
Heading structure is a very important aspect of writing a blog. These headings shape your blog and define a clear structure. You can add headings from H1 to H6 on the blog page.
You can add a heading from the Plus Icon at the top left corner.
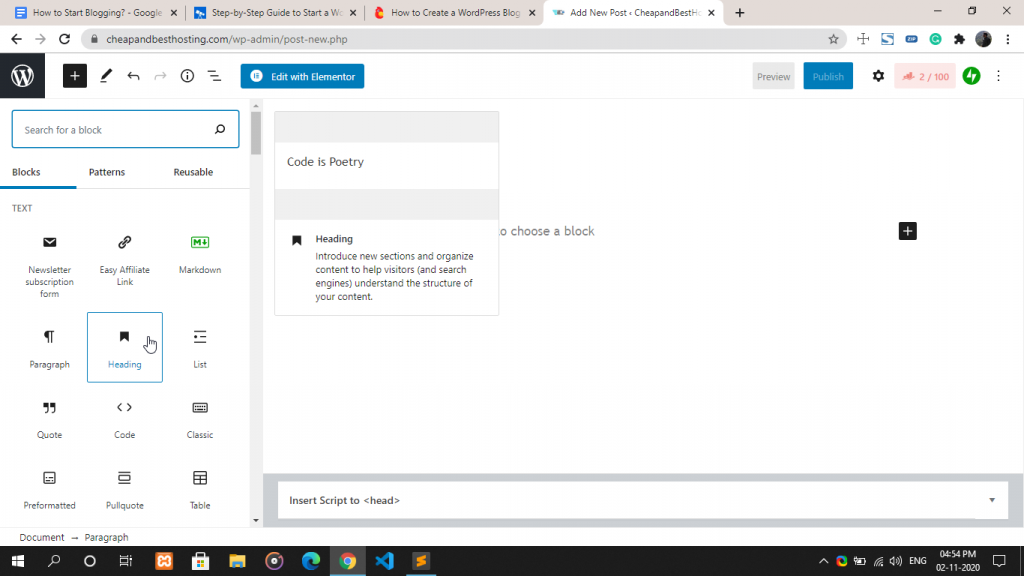
Just tap on Heading, and there will be an option to add a heading to your page. You can change your Heading between H1 and H6 from here.
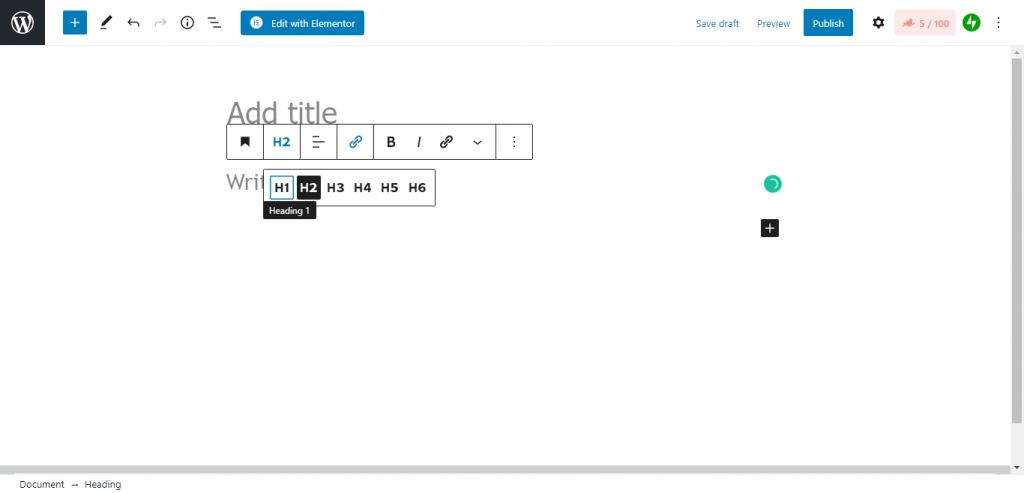
A heading can be customized in terms of font size, color, and other settings from the settings icon on the top right of the toolbar at the top.
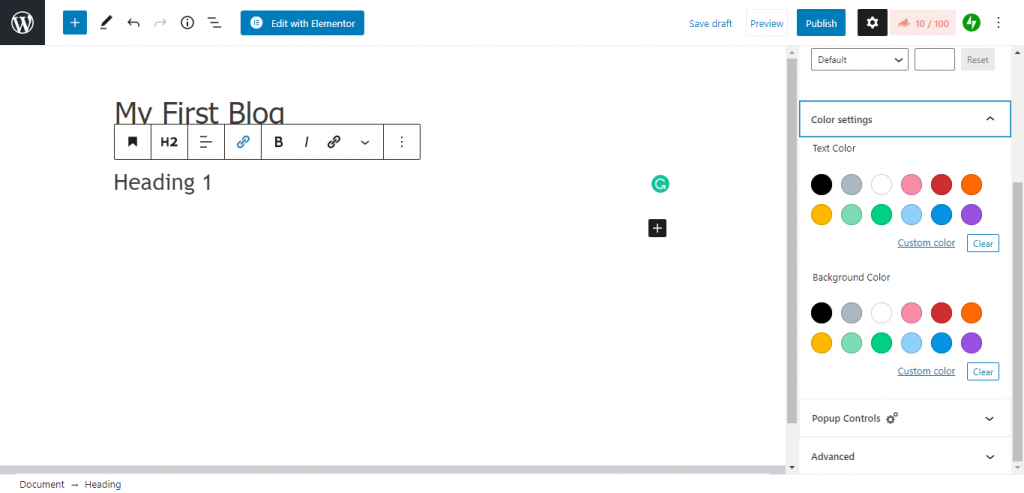
Here, in the above image, you can see that we can customize the color and size of the Heading 1.
Adding List
A list makes your WordPress blog attractive, clear, and makes your work easier. You can add lists under the editor.
Just tap on the Plus Icon and select the List Option. As you click on List, there will be an option to add your list to your page.

You can see the edit and advance option for the list.

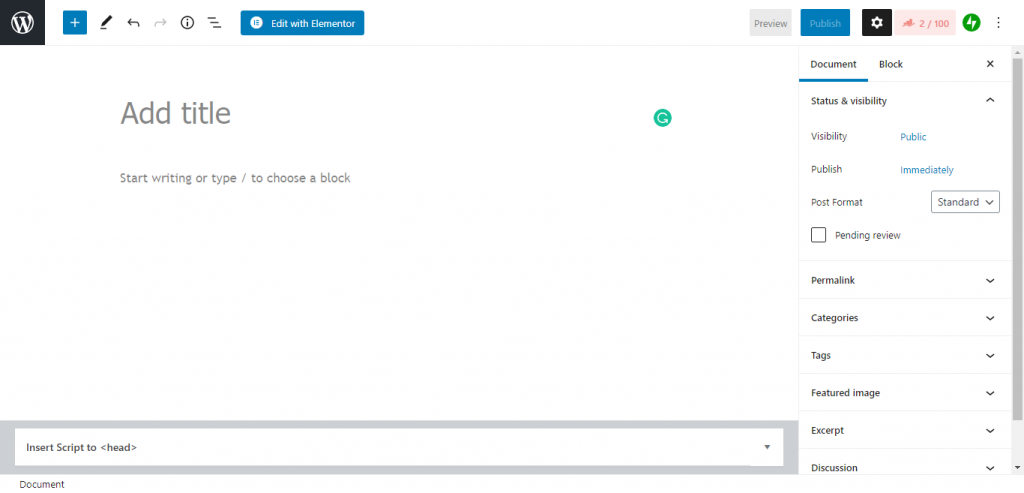
Adding Paragraphs
To add a paragraph under the heading inside your blog, there is a paragraph tool to add paragraphs in the editor.
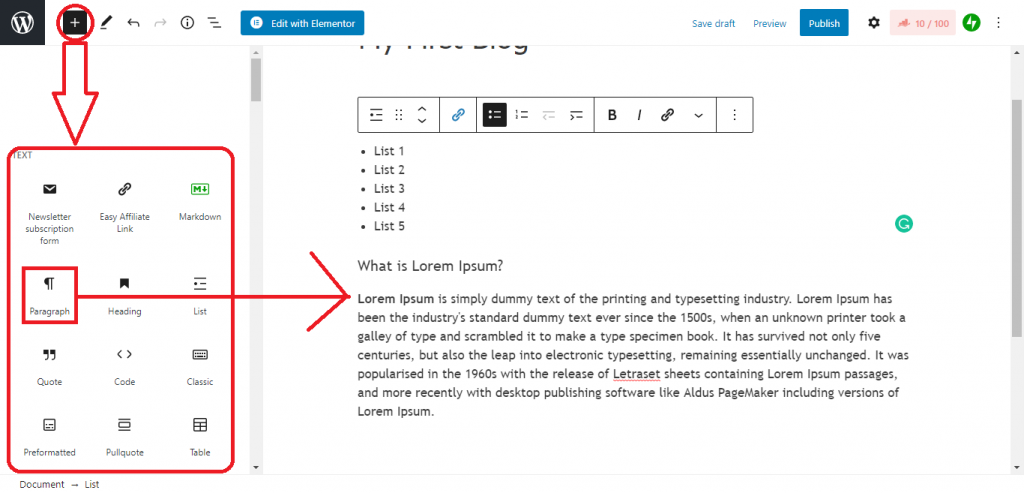
Here, you can see an option to add a paragraph inside your blog. So, as you add a heading, lists, and a paragraph, now you can add images and a table inside your blog by just tapping on the respective categories.
Add Media
Images and media make your blog more attractive and useful for the users. You can select the image option for adding an image to your blog.
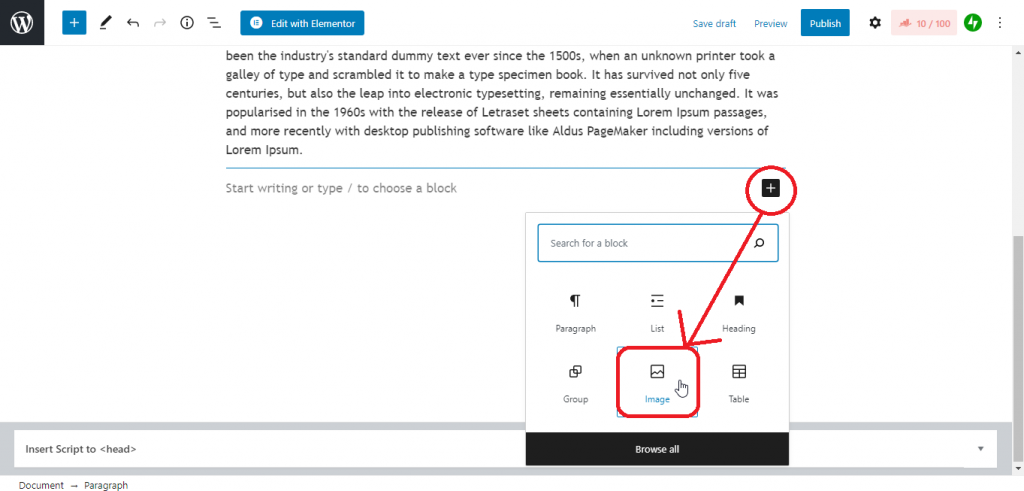
After tapping on the image, you will see the upload option.
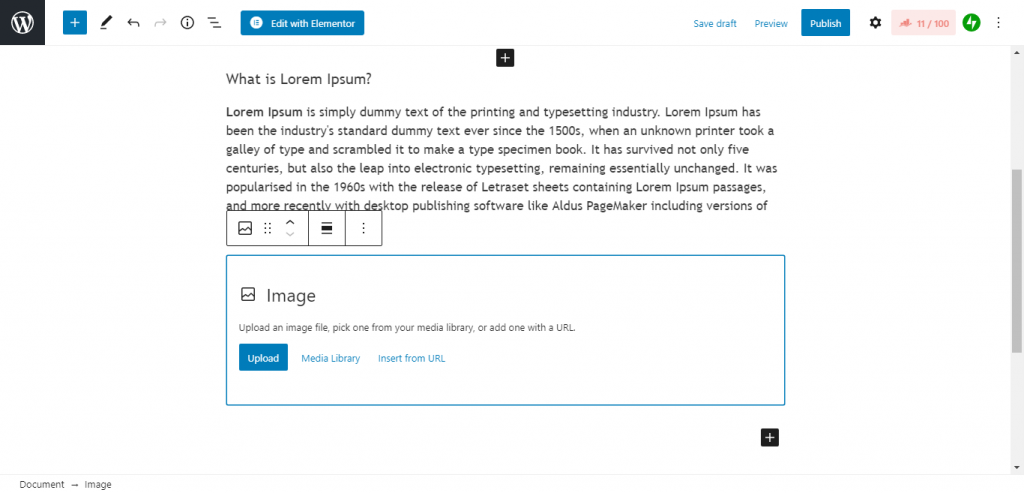
You have three options: to upload from PC, URL, and from your Media Library.
Choose your image from your desired location, and your image will be added to your blog.
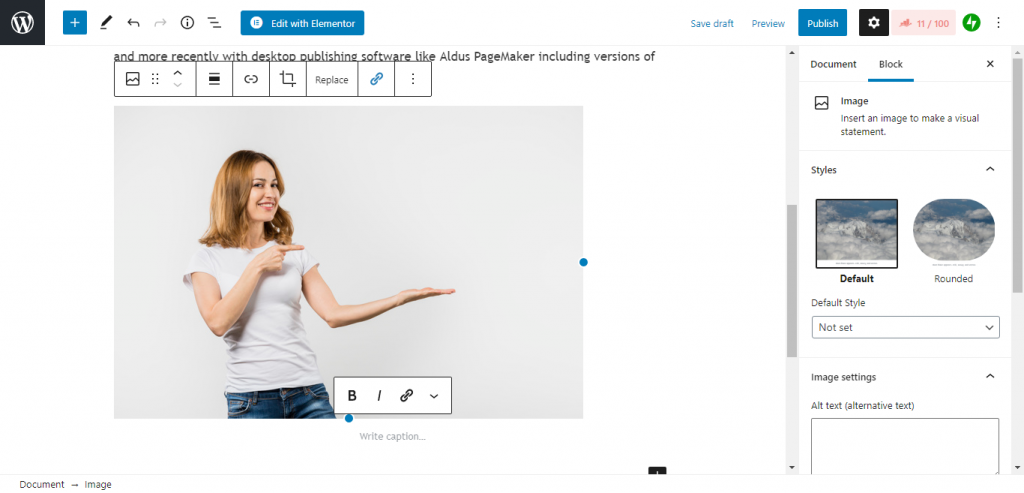
Here, in the above image, you will see the customization options to customize your image.
How To Create Categories and Tags For WordPress Posts?
When you create a WordPress blog, you create different pages and posts to your blog. So having different categories and assigning them with the tags makes work easier.
How to Add Tags In WordPress Post?
To Add Tags to your Post. Go to Dashboard > Post > Add New/your previous post, open it.
On the right panel,m you will see the option of Tags; tap on it, start writing your tags, and end every tag with a comma to write a new tag.
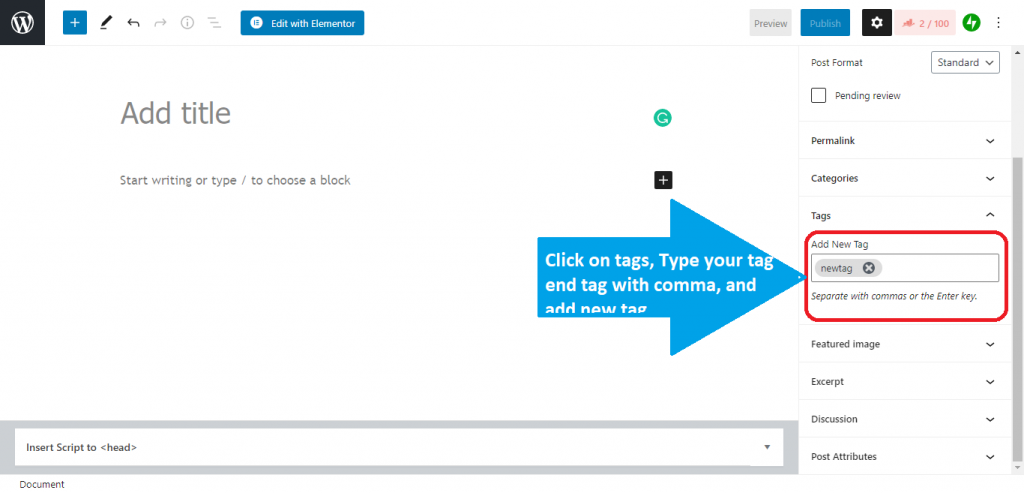
The above-attached image may help you add tags in your post.
How to Add Categories in WordPress Post?
To add categories in your WordPress Post, there are very few simple steps to add a new category for your posts.
- Go to the Dashboard.
- Then, under Post, you get the option of Categories.

- Tap on Categories, then Add New.
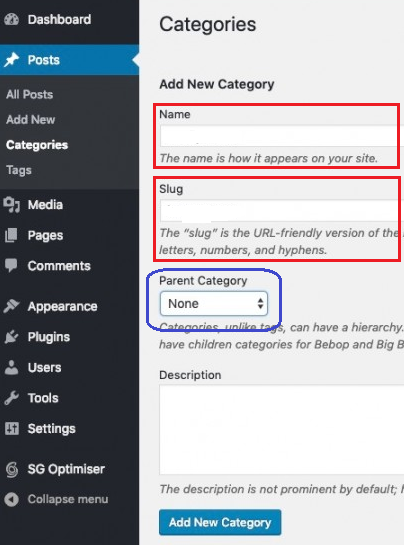
Add the name of your category, the slug(short URL for that category page), parent category if you have one, and description; finally, tap on Add New Category.
Creating Blog Banners is Necessary
Blog Banners create a big effect on your WordPress blog. For creating blog banners, you can use copyrighted images and edit them as you want, or you can use Canva for creating your blog banners.
Now, I’ll tell you how you can create free Blog banners in Canva.
The first step is to open Canva.com. You will see this screen below.
Just Sign Up with your Google account, and you will be redirected to its home page.
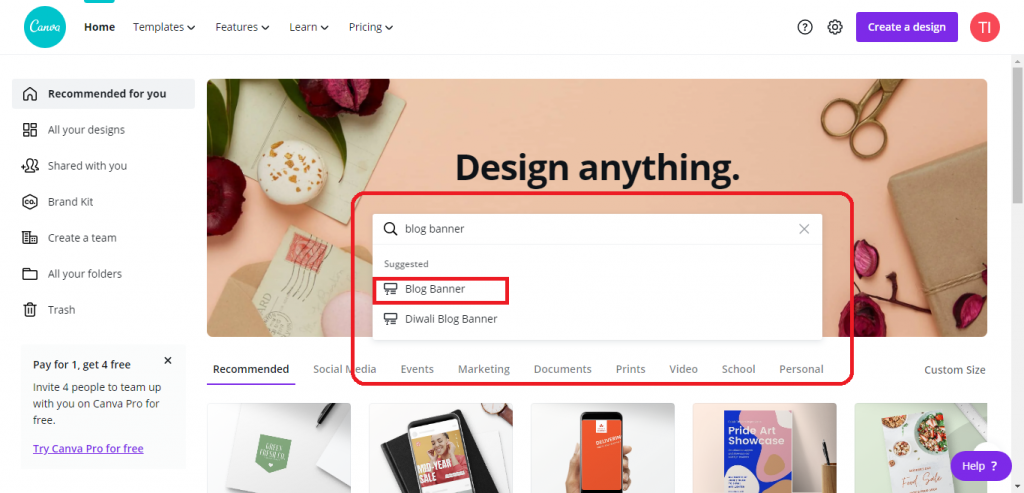
Just search for Blog Banners, and you will see the number of blog banners there.

Select the best template for you, and start editing it.
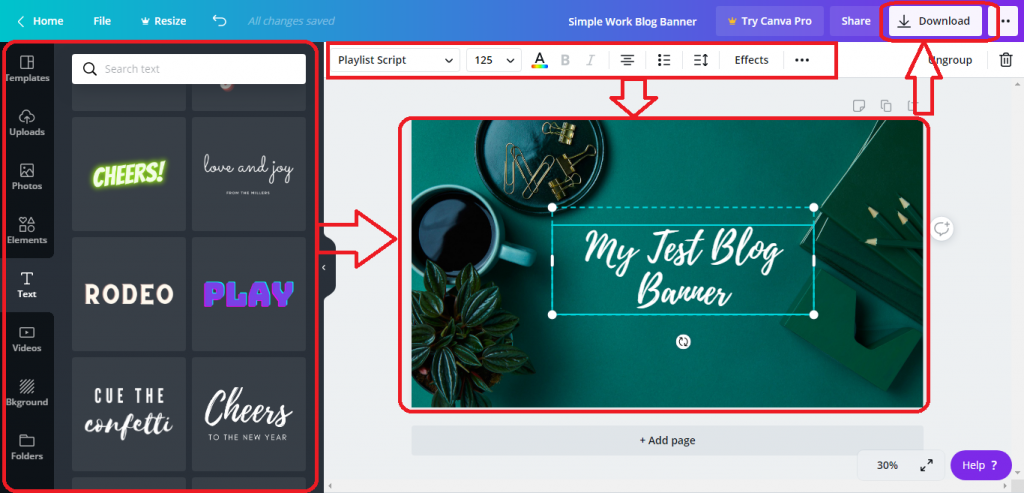
As you can see in the above picture, you have all the options to edit your banner, and after you edit your banner completely, you can download it from the download button at the top-right corner.
Grow Your Audience
If there is any reward for blogging, then it’s a growing audience. The growing audience increases the traffic on your site, and soon your blogs start getting offers for monetization.
Use SEO Optimized Keywords
But how? Actually, mastering SEO and using SEO optimized keywords while writing blogs is a masterstroke. I have used SEO keywords in all my blogs right from the beginning.
For you as a beginner, you can take the help of SEO toolkits to identify the keywords for a particular topic.
Start Getting Paid For Your Blogs
Whether you have started your blog out of curiosity or simply as a hobby, getting paid and generating income is a motivation to continue writing blogs for the long run.
There are multiple options to generate income, but the most popular and effective path is “Affiliate Marketing”. You can search for the companies and brands that belong to your particular niche and visit their affiliate program pages.
For example, Amazon is a popular company that has various services and products to promote. Visit there Affiliate program page, that mostly seen in the footer section. Check for the products that you can promote and offer high revenue, recurring commission and accepted worldwide.
You can also use affiliate networks such as ShareASale, CJ Affiliate, and many more to find reputable companies.
Note: Don’t forget to track your sales regularly.
How To Secure Your Blog With WordPress?
Many users ask whether WordPress is secure or not. Although WordPress is always focued in upgrading the security, but you can make your blog more secure.
So now, creating a WordPress blog section is complete; let’s discuss how you can secure your WordPress blog.
Pay For Secure Hosting
If you have read our article above, you must know that WordPress provides you with free as well as paid hosting.
If you want a more secure blog, you have to invest, because free things do not provide you with the best facilities.

So, after a certain time, once you start getting traffic, go for paid hosting for your blog, or you can go with WPX hosting, which offers you the best hosting.
Keep a Strong Username and Password
It will sound weird, but you know having a strong username/email and password is the best way to secure your WordPress blog.

It is seen that most of the users have very simple passwords like:
- 123456
- Abc123
- Name123
- name123#
- 11111
So basically, the point is to say that you can set your password with a combination of all special characters and numbers, which cannot be stolen by someone else.
Always Have The Latest Version Of PHP and MYSQL
PHP(Hypertext Pre-Protocol) is itself a scripting language. PHP is the root of WordPress, so having the latest version of PHP is very important.
Right now, the latest version of PHP that WordPress uses is PHP v7.4.
According to the Official WordPress Stats page, only 14.6% of users are using it.
Get Updated With Your WordPress Themes & Plugins
An update in any theme or plugin means that they have fixed some bugs and are providing you with something new.
You will see the Update notification whenever you get an update for Themes and Plugins.
Replace The WordPress Admin URL
When you create a WordPress Blog, then you have to be protective of your blog. So, changing the URL of the admin login can be a good step to secure your WordPress Blog.
Changing or replacing the WordPress admin URL is so simple, just go to your Dashboard > Settings > Permalinks, there you will find the option to change the admin login URL.
For your comfort, I am attaching the screenshot of this.
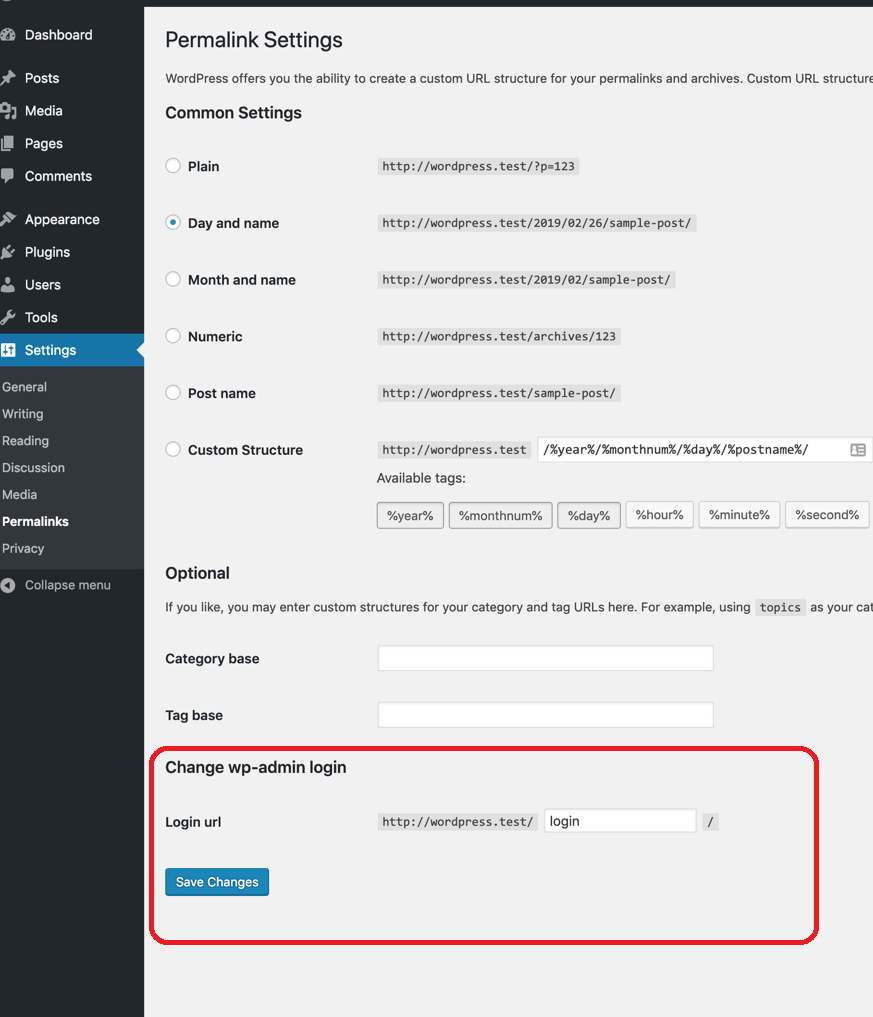
You can set the address as admin-panel, admin-login, whatever you want that will be comfortable for you.
Two-Factor Authentication in WordPress
When you start a blog in WordPress, it gives you the option of Two-Factor Authentication to make your WordPress blog more secure.

Many big companies like Google, Facebook, and WhatsApp use this two-factor authentication service. Generally, Two-Factor Authentication is TOTP(Time-based One-Time Password) via text SMS, email, or via Phone Call.
So, when WordPress provides you with this service, you should take advantage of Two-Factor Authentication.
Install SSL Certificates
When you create a WordPress blog, you transfer your data from place to place. So what SSL does is encrypt your data, which creates trouble for hackers.
Many Hosting providers give you a free SSL certificate; you just need to install it from your WordPress dashboard.
Many of you have seen that green lock in front of the URL, which means the site you have opened is SSL-certified and is secure to use.
Here I am attaching an image of it below: –

Or if your hosting does not provide you with free SSL, you can get it free from Let’s Encrypt.
Importance Of Keyword Research for a Successful WordPress Blog
The first question is, why is keyword research important? The answer is that the main purpose of doing keyword research is to optimize your blog using those keywords that the users generally search on Google.

Our keywords should match those words and phrases that the user is searching on Google.
Now the question is, how can we do that in our WordPress blog? We will discuss this below.
Start Your WordPress Blog With Popular Niches
As I said before, when you start blogging with WordPress, select your niche for writing a WordPress blog on it.
When your content of the WordPress blog will be strong and mostly searched by users, then automatically your WordPress blog will grow.
Do Research on The Most Searched Keyword on Google
You should search for the SEO keywords that are mostly used on your related topic of the blog. As we know, Google always tracks our data and searches for SEO keywords. You have to give your best to rank your blog on Google.
How Can I Search For Keywords?
Well, you can search for keywords by analyzing the content and identify the keywords they use on different websites that are ranking on top of google’s first page.
You can read their headings and the words that are used repeatedly by those top 10 websites.
There are some best keyword research tools for you: –
- UberSuggest (FREE, not 100% accurate but mostly works)
- SEMrush (Paid, but gives you a 7-day FREE SEMrush trial)
- Google Keyword Planner (FREE), and many more…
WordPress.org v/s WordPress.com
So many users are confused between WordPress.org and WordPress.com; therefore, I decided to mention this topic here.
WordPress.com provides you the free hosting but features are limited and not recommended if you want to earn through this blog.
However, WordPress.com offers paid hosting plans as well, for example, business and premium hosting; the choice is up to you. The less you pay, the more you are restricted to the facilities. WordPress.com is the best for starters and beginners.
WordPress.org allows you to host your site on your preferred web hosting. It offers great tools, flexibility, and optimization features.
WordPress.org says, “Get your hands dirty, and host your website yourself.” WordPress.org is a self-hosted WordPress where you host your own site here.
I think the table below gives you the best comparison between WordPress.org and WordPress.com…
| WordPress.org | WordPress.com(Free) | |
| Price | Minimum $25/mon. | Free |
| Complete Plugin Support | Yes | No |
| Customizable Domain | Yes | No |
| Supports All Themes | Yes | No |
| Maintenance | Yes | No |
| Full SEO Optimization | Yes | No |
| Disk Space (Hosting) | Unlimited | Limited Upto 3GB |
| Full Control | Yes | No |
| E-Commerce Support | Yes | No |
Which one is better for you?
It depends on what your blog or site is about. But we know now that WordPress.org gives you self-hosted hosting, where WordPress.com is managed hosting. Let’s go a little deeper into this.
WordPress.com
WordPress.com, or you can say managed hosting- yes, you read this right. WordPress.com is a managed hosting where you don’t need to do anything else but just focus on your content.
You do not need to download any software of WordPress to install on your server. WordPress.com is the best for beginners, students, and non-commercial sites.
WordPress.org
WordPress.org can also be called a Self-Hosted WordPress Site. Here, you host and manage your site’s all tasks related to themes, plugins, etc.
If you are going with WordPress.org, you must have some technical knowledge because here, you are the Publisher of your Website. However, it is not at all difficult.
It is just the opposite of WordPress.com because here you have to download the WordPress software and install it on your server.
How To Create a Free WordPress Blog?
We have discussed above the difference between WordPress.org and WordPress.com. But if you are a beginner, you should first try the free version.
So for those, we recommend you go for WordPress.com’s free plan for you.
Getting Started With Free WordPress Blog
Go to the WordPress.com login and click on the Start your website button to start a free blog on WordPress. Once you click that button, you will be redirected to the plans page of WordPress.com.
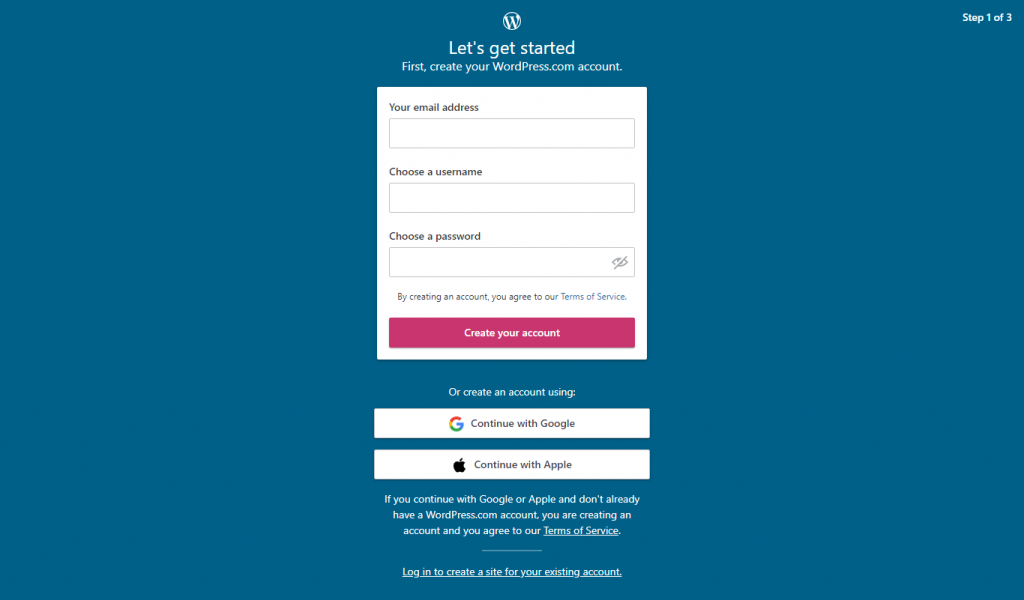
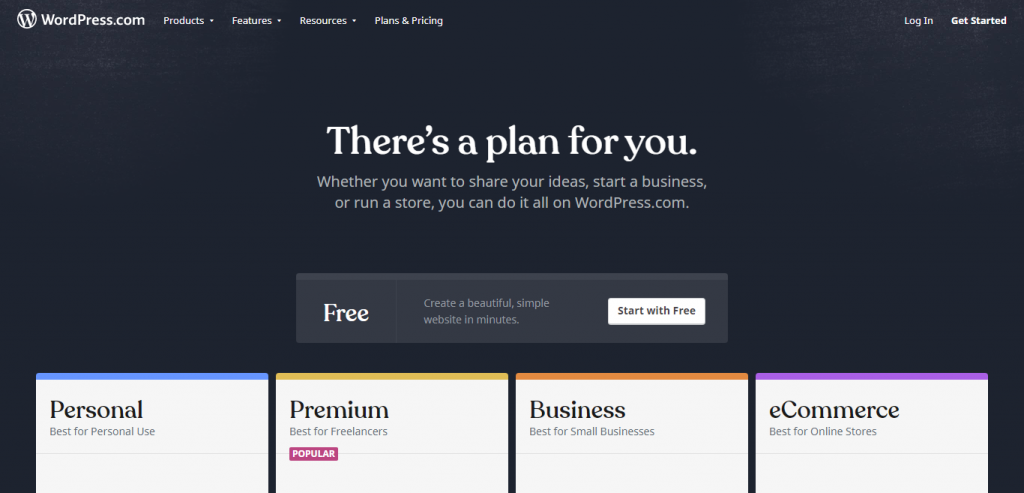
There you will find the Start with Free Button at the center of the page. Click that button and go ahead with free blogging with WordPress.
After clicking on the Start with a free button, you will be asked to choose a domain name for your blog.
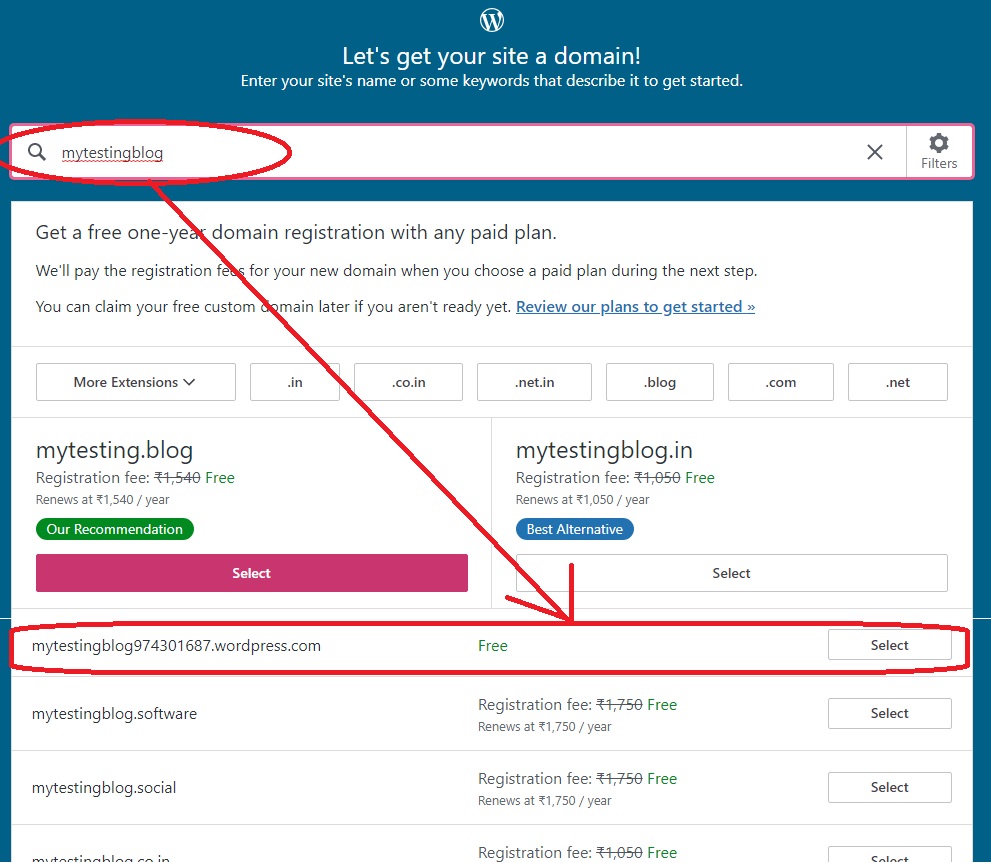
When you enter your domain name, WordPress will show you all available domain options for you. You have to click on the first domain in the list, as I showed in the above image, because it’s free. Click here, and next you have to click on Start with a free site.

Welcome To the WordPress Dashboard
Once you have done all this, WordPress will take some time to create a blog and dashboard for you, and then you will be redirected to the Dashboard.
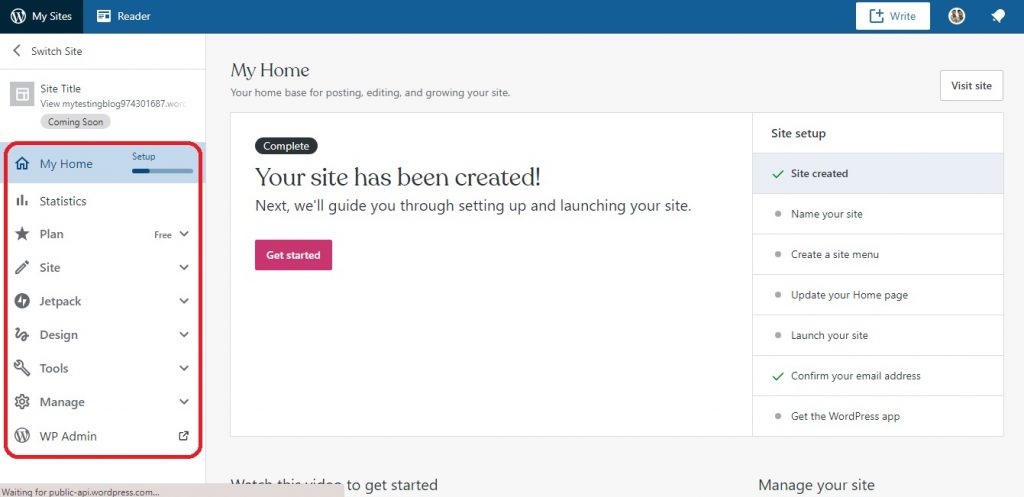
This is what your free WordPress dashboard looks like. Here, on the left panel, you will see a navigation bar that contains different tools.
And on the right panel, you will see the rest of the setup needs to be done, so do that without any problem or doubt.
Set The Name of Your Blog
It’s time to set the name of your site. Click on the Name of the site, and you will be redirected to the settings.
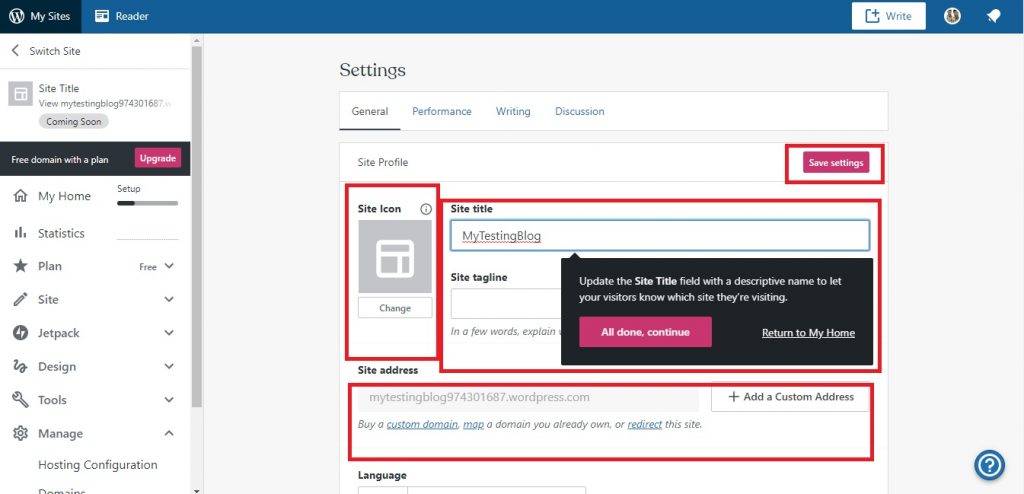
Here you can set your Site Icon, Title, Taglines, and you can also have a custom URL if you want. Set all necessary settings and don’t forget to click on Save Settings.
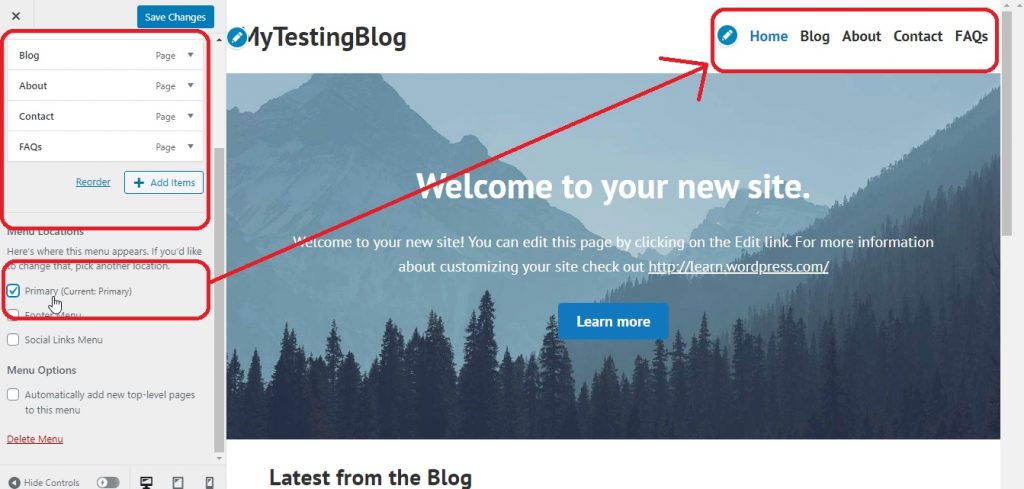
Create Site Menus
Once you have done all this, go back to the My Home page. And let’s add Menus to our blog.
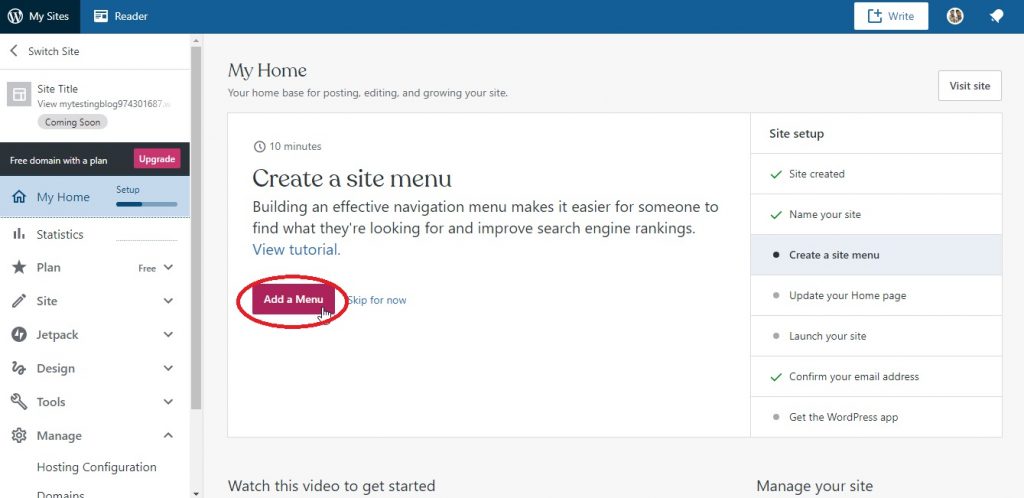
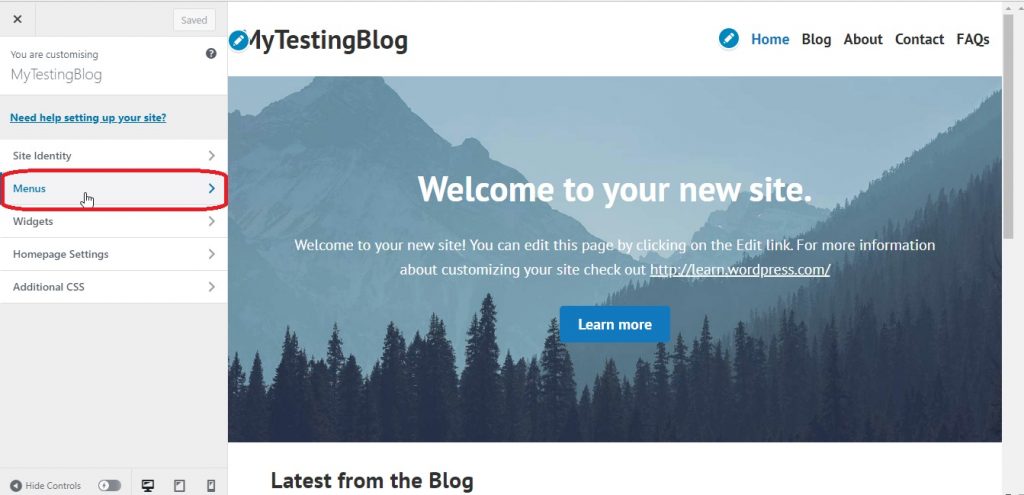
Tap on the Add a Menu button. When you click that button, you will be redirected to the customization page, where you can customize your page or blog.
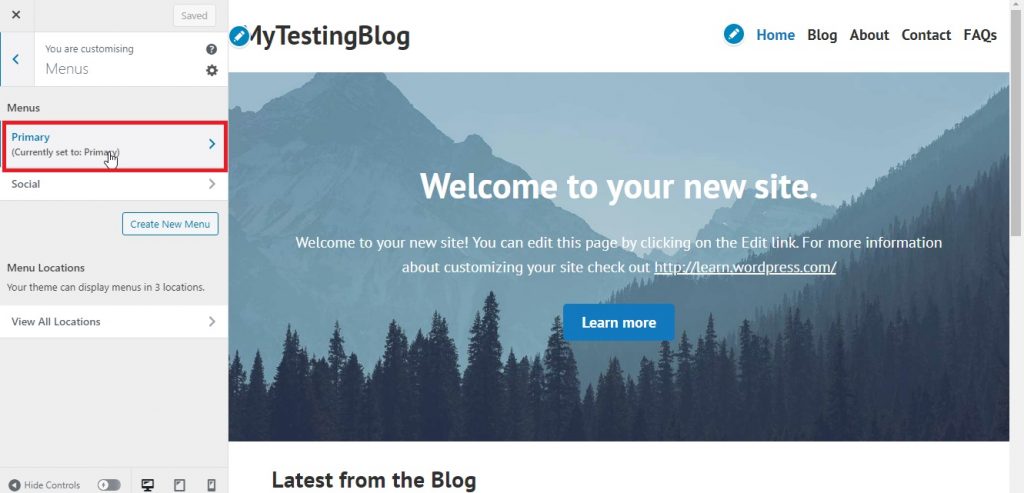
Here, select Menus and select Primary to change the primary menu that appears at the top of the blog page of our WordPress site.
When you have entered the primary section, tap on Add Items, write your menu name, tap on Add, and you will see your menu will be added to the above list.
Click that + button, and the menu will be added to your list of menus.
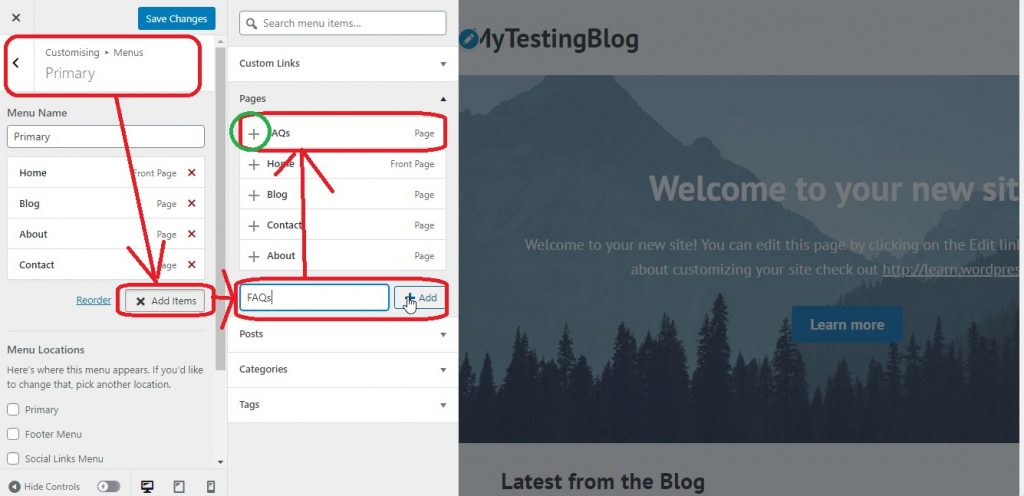
This is not done yet; you have to select that checkbox below the menus on the left panel named Primary, select that option, and save changes.
You will find all the necessary settings here; just go back and come to this menu as shown below:-
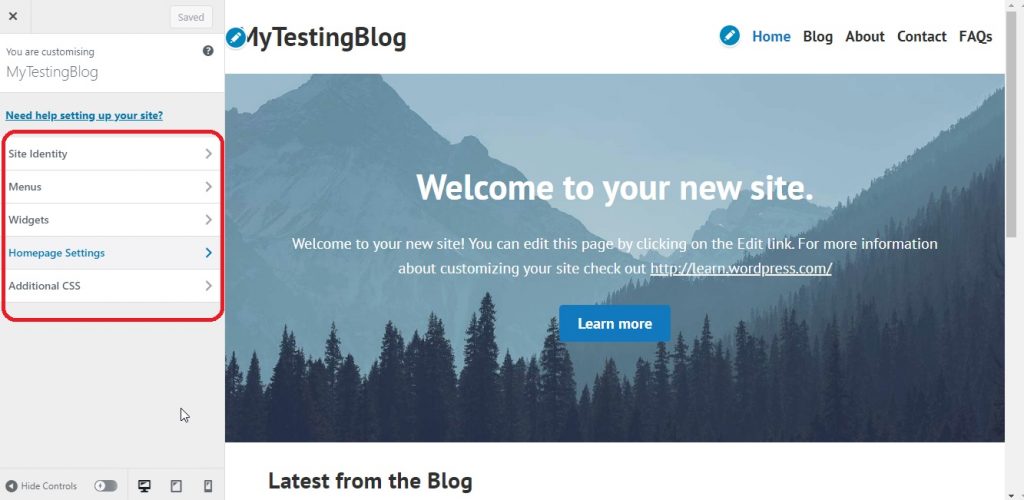
Under these settings, you will find all the important and necessary settings you need to do with your WordPress blog.
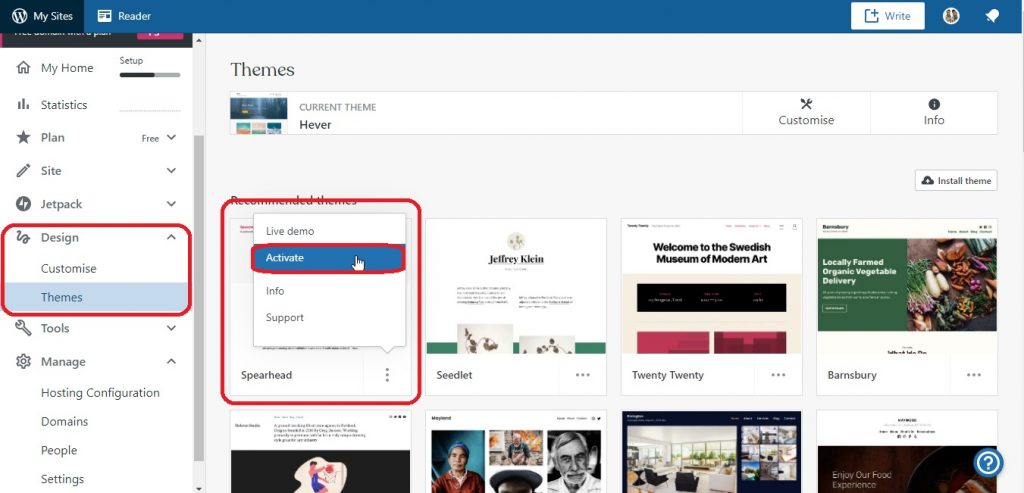
Set Theme For Your Blog
Yes, you can change the theme for your blog; just go back to My Home, and there you will see a Design category.
Under Design, you will find the Theme option; tap on that, and you will see a bunch of free themes you can apply to your blog.
Add Plugins To Your Blog
Adding Plugins to your site makes your work easier. You can find your Plugins option under the Tools category.
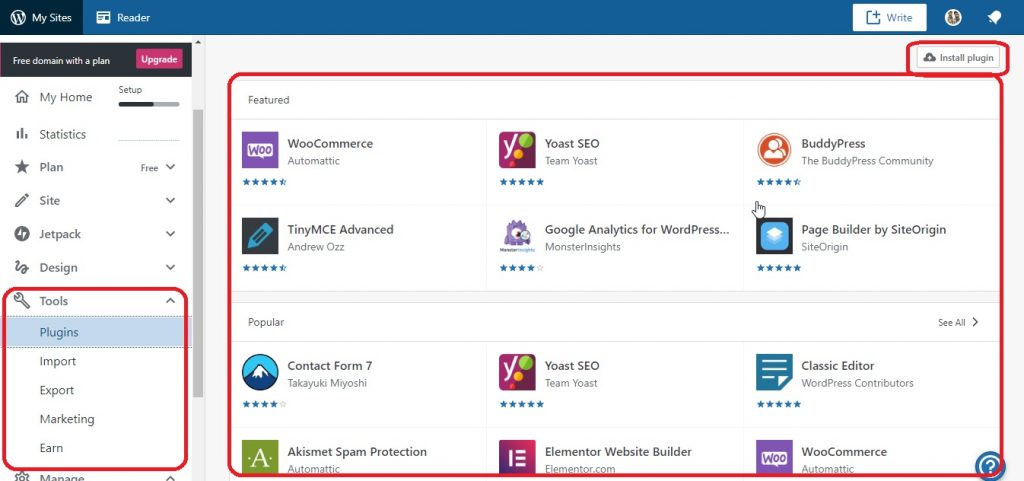
You can install your desired plugin from here, and also you can upload and install your plugins.
And now you are all set. Create a free blog with WordPress now with few simple steps.
Checklist- What You Need Before Creating A WordPress Blog?
| Sl No. | Item | Importance |
| 1 | Choose a Niche | This is the first and major step to choose a niche that suits your interest. This will help you move towards the next steps. |
| 2 | Catchy WordPress Blog Name Ideas | Once the Niche is decided, you need an easy-to-remember, catchy, and creative Blog name. Shortlist 3-4 before you search for available domains. |
| 3 | Identify Target Market and Audience | Next is to decide the audience based on various demographics like geography, age, etc. Prioritize the worldwide accepted products and services to promote. |
| 4 | Keyword Research | This is the first and major step: choose a niche that suits your interest. This will help you move towards the next steps. |
Over To You, Time To Start Your WordPress Blog
You have visited this page because you wanted to start blogging with WordPress. In this article, I have covered both ways to create a WordPress blog: a FREE and Paid method.
Using our steps mentioned, you will be able to set up your blog in just 10 minutes without any difficulty. When I created my first blog, I personally faced lots of challenges.
There are several choices available when you start a WordPress blog; I suggest you choose the best hosting if you are going to run a business with your blog.
We all need support when we start a task that is completely new for us. If you are creating a blog in WordPress and facing any type of problem, you can directly contact me via comments, or you can join our Facebook group; I mostly answer your queries within 24 hours.
FAQs
How to start a blog on WordPress for beginners?
It requires a few major steps, starting from selecting a platform to host your website and post your content, such as buying web hosting, selecting a domain, installing WordPress, setting up themes, adding plugins, and finally posting your blog.
Does WordPress pay bloggers?
WordPress does not directly pay bloggers, but it helps in monetizing your blog by providing a platform for your website to publish your blogs. It becomes a medium for connecting you to your audience and then to affiliate marketers.
How do I write my first blog?
Start your blog by picking a reliable hosting platform, selecting the perfect niche that suits your interests, brainstorming your topic, structure you content by adding headings, using SEO keywords, don’t forget to add images, and start writing your first blog.
Is WordPress free for a blog?
Yes, WordPress provides free themes, endless templates, and plugins to help you write your blog for free; this is especially good for beginners.
Will AI replace bloggers?
No, AI cannot replace bloggers, but yes, using AI to research your topics understanding in depth in less time can be considered beneficial for content writers. Still, readers believe in human written blogs then the text generated by AI.
Related – Hosting Reviews and Opinions | Web Hosting Discount Coupons | VPS Black Friday Deals | Black Friday Web Hosting Offers | Home
About Author: Vishesh Gupta

Seasoned Professional with 15 years of experience in Sales and Marketing. Entrepreneur, Consultant and Blogger helping people earn through jobs and blogging. Experienced Hosting Reviewer who likes to collect detailed info about existing players and share it with my audience. Previously worked with leading Banks and Telecom Companies.
I completed my Masters in Management with specialization in Finance and Marketing.
Visit our Hosting Review and Blogging Guide for more interesting articles.
Get to know step by step procedure for creating a WordPress blog. Thank you!
Thanks Ishita, Feel free to discuss in case you have any doubts about blogging.
Thanks for sharing such information with us. Which hosting plan is best for blog WordPress log and which niche is most suitable for beginners? how do I decide my target market and audience?
Hi John
Starting a WordPress blog is just a 2 minutes job today. The biggest and most crucial task however is to decide the target market and niche.
The target market should be the one where your keyword is searched maximum. The audience should be the one who is looking for that particular keyword the most.
Your content should be helpful for your audience.
One tip – choose a keyword that is low on competition and a niche that you have full information about.